
Many, many years ago I baked some peanut butter cookies for my dad. My mom would always make chocolate chip cookies; but, I somehow thought peanut butter was more fitting. Upon eating them he mentions to my mom how peanut butter cookies were his favorite. Much to my mother’s chagrin, as she was always toldContinue reading “One Bowl Grain-Free Peanut Butter Chocolate Chip Bars”
Tag Archives: cookies & bar cookies
Chocolate chip cookies change the world
This picture is from my Instagram feed where I wrote, Almond meal chocolate chip cookies for my girls and their neighbor friend. #sharethetable is not being fancy, but quickly mixing up some chocolate chip cookies to provide a sense of “home” for my children and the children who enter our home. This is hospitality toContinue reading “Chocolate chip cookies change the world”
Grain-Free & Peanut Butter-Free Monster Cookies
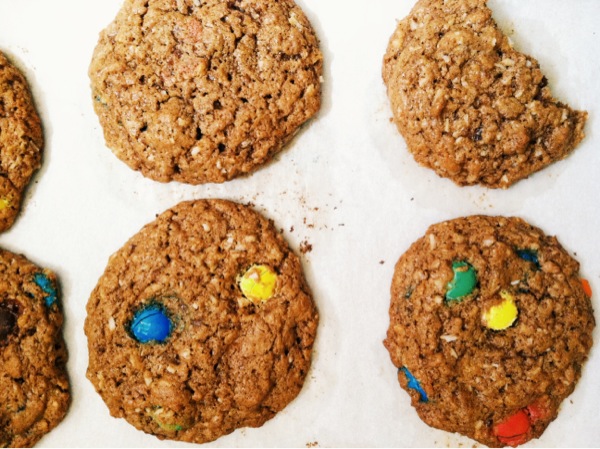
I read this honest, vulnerable piece on overeating today and it struck a chord with me. I was hit by how often I hear from someone, be it a close friend or acquaintance or reader, “Well Kamille, you eat really healthy!,” or, “Oh, Kamille has a blog where she talks about food and hospitality, andContinue reading “Grain-Free & Peanut Butter-Free Monster Cookies”
Paleo Zucchini Brownies
Brownies are one of my favorites, because truly, what is there not to like about a cake-like bar that is not a cake and can be cooked in one pan. I commonly ask people if given the option between the following: chocolate chip cookie, cake or brownie, what would you choose to have once aContinue reading “Paleo Zucchini Brownies”
Being a Blessing & Banana Bread Chocolate Chip Cookies
Whenever the summer fades and autumn begins, or winter days emerge, banana bread is comfort food. Our week has been a winter wonderland. Monday the snow began to fall with Tuesday being knee deep for the littles, and today well below freezing. Any plans that we had hoped for have taken a turnContinue reading “Being a Blessing & Banana Bread Chocolate Chip Cookies”
DIY Chocolate Chip Cookie Dough Takeout Gift
It’s approximately nine days before Christmas, and if you’re anything like me, you might have some last minute gifts to put together. After making my homemade vanilla salt, I had in mind to pair it with my favorite cookie dough as a “bake it at home” gift for friends & teachers. If you’re lookingContinue reading “DIY Chocolate Chip Cookie Dough Takeout Gift”
Hosting a Cookie Swap
When newly married, I was eager to have a cookie swap party. An opportunity to open my home to friends & acquaintances, to share our beloved cookie/candy to box up to take home. There were platters with printed tags for each friends goodie to match. Recipes of each cookie compiled into a book, andContinue reading “Hosting a Cookie Swap”
Apricot Rosemary Bars & Post Whole 30 Living

The end of Whole 30 has come & go and I’m able to eat whatever I’d like. If I want chocolate, I can. If I want dairy, I can. If I want to continue eating Whole 30 style, I can. After reading about my limitations during November, you might think I would wholeheartedly forgo what I did in those 30 days. But, I have found a different kind of freedom and my tummy (and more) actually has made it quite clear what should not go in it.
I think the hardest part for me is the anxiety about eating food that might be less than optimal for me. I have gained not only a leaner body, but the best energy level I’ve ever known. I even got to a place where I wasn’t even tempted to eat sugar, drink a mocha, or have a pastry. I have come to recognize where my pitfalls are along the way (sugar is huge). I feel like I’ve found food salvation. A freedom to eat to nourish, sustain & enjoy without partaking in what might be viewed as “extras.” And I truly would love for everyone I love to give it a try, because I think it will not only tell them a bit about their physical body, but mental & spiritual body as well.

Where do I stand at this point in life. I haven’t felt any better than I did during Whole 30 and the days following. When I added gluten, dairy, sugar or corn back into my body (even in small amounts) it didn’t leave me with a great, healthful, energetic feeling. Dairy hit my stomach with gurgles. Gluten has done some other stuff, along with inflammation throughout. While sugar is a big one. Just the littlest amount made me sick. However, being a couple of weeks off of the challenge, I have had a bit more sugar than I would have liked to put in. I’ve realized that although I had a sugar upset in the first couple weeks (post Whole 30), it would go away if I continued to feed my body sugar. My body would get use to the upset; however, a host of other problems occurred that had gone away when I wasn’t partaking in sugars.
What I’ve discovered so far is I’m pretty sure I’m going to eliminate gluten from our household, along with most grains (gluten and non); as well as, limit sugar intake. (Sidenote: I’ve also noted the rise of behavioral episodes in my girls when they have had refined sugars & gluten in their system) I like what these posts have to say about living out a balanced life. I’ve hit a place in my life where I actually don’t feel like I’m missing out by not having a mocha, or gluten-filled goodness. I have also realized that I’m excited about balancing out the sweets I make, and the challenge I get to embrace by transferring all my baking & cooking knowledge to this new food eating thing. So, if I can share one of my first baked goods creations with you, I’m certain you’ll be surprised that this does not fit in the ‘bleh’ gluten-free, sugar-free, grain-free category.

Here are my Apricot Rosemary Bars. I spotted them in the book Baked Explorations. I knew that I would need to change it up quite a bit. And let it be known that I’m not willing to compromise taste, or make something that was once texturally appealing is now very ‘bleh.’ I am also fine with using butter. If I can sub in another form of healthy fat, then I will. But when a recipe would benefit from the buttery goodness found in “butter,” then you’ll find it here. But…I will still keep my recipes with gluten and non on this blog, because they are apart of my journey. And you will receive no scorn from me if you check out some of my other goodies from last year–Merry Christmas!
P.S. Today is my nephew Lucas’ birthday. I still remember seeing him just a week old, while Tayers was 6 weeks. He was a little pipsqueak, but so very precious. His parents were overcome with joy as their anticipation was finally revealed. Seems fitting as he was born just two days before Christmas. Happy Birthday sweet Lucas!
A Year Ago: Gingerbread Man Pancakes & Swedish Tea Ring (Vetekrans)
Rosemary Squares (printable recipe)
This recipe is inspired from Baked Explorations by Matt Lewis and Renato Poliafito. I have revamped quite a bit from the original; however, the spirit of the original is still fully in this recipe. I used Honeyville Blanched Almond flour. I also used California dried apricots and not the typical, sweeter ones you find, which are a product of Turkey. Opt out of the product of Turkey and find the California ones, which are a bit more tart and a beautiful, bright orange (Trader Joes carries them). Also, I don’t have a dilemma in using real butter; yet, I chose to do half coconut oil & butter. Another fat option for the shortbread might be olive oil. If you are wanting to make this without the egg yolk–it would be fine.
For the rosemary shortbread dough:
6 tablespoons unsalted butter, cubed, chilled
6 Tb coconut oil
1/3 cup + 2 Tb (70g) raw clover honey
1/2 teaspoon salt
1 teaspoon vanilla extract
grated zest of half a lemon
1 1/2 teaspoons finely chopped fresh rosemary
3 cups (250g) almond flour
1 egg yolk
For the apricot filling:
2 cups (8 ounces, 230g) California dried apricots (not from Turkey)
1 1/2 cups (375ml) water
3 tablespoons (60g) honey
pinch of salt
For the crumb topping:
1 cup (85g) almond flour
1 Tb raw clover honey
1/3 cup (40g) pecans chopped
pinch of salt
2 tablespoons unsalted butter, cubed, chilled
Directions:
1. Preheat oven to 350. Line a 9-inch (23cm) square pan with parchment paper, leaving an overhang on two sides of the pan.
2. Make the rosemary dough by creaming the butter & coconut oil for about 1 minute, or until it’s fluffy & creamy. Add the egg yolk and mix just till combined. Add the salt, vanilla, lemon zest, and rosemary, then add the 3 cups almond flour, mixing until the dough is smooth and all the ingredients combined. The dough will be more sticky, but not wet.
3. Transfer the dough to the prepared baking pan and pat it flat into the bottom of the pan. Spreading it evenly with a rubber spatula. (if you want to refrigerate for 30 minutes you can; however, I did not and it was fine.)
(No need to wash the mixer bowl; you can use it as is for the crumb topping in step #7.)
4. Bake the rosemary shortbread for 30 minutes, until golden brown. Once baked, let the shortbread cool to room temperature.
5. Make the apricot filling by combining the apricots, water, honey, and a pinch of salt in a medium saucepan. Simmer over low heat for about 45 minutes, or until all the liquid has just about been absorbed. Let cool for a few minutes, stirring, then puree in a food processor until smooth.
6. Make the crumb topping by mixing together the 1 cup (85g) almond flour, honey, pecans, salt, and butter in the bowl of the stand mixer, with the paddle attachment, until the mixture just barely starts clumping together.
7. Spread the apricot filling over the shortbread in the pan evenly, then top with the crumb topping and bake for 25 minutes, until the topping is browned.
8. Remove from oven and let bars cool completely in pan.
To slice, lift the bars out of the pan by grasping the edges of the parchment paper. Slice into squares.
Sour Cream Apple Crumble Bars

I will continue to love Autumn more than any season, and I don’t think it will ever leave, to which I’m grateful. The vibrant colors alone rap my heartstrings (doesn’t take much). And nothing says Fall quite like the wafting aroma of cinnamon, nutmeg, ginger & cloves. Puddle jumping never seemed so invigorating. Then, there’s the visit to the pumpkin patch or apple orchards, while bundled up in “sweater weather” with the crisp air and crunch of the leaves with each step. Oh Autumn, can you stay like this well into late November? Autumn seems to call out, “come inside, bundle up, sip some cider by the fire, and be.”
 How they smile for the picture
With the busyness of summer feeling a bit nomadic, Autumn let’s us know that it’s okay to be sedentary, to regroup and develop a game plan (fitting that football is in the Fall) of where you’re going next. I’m reminded of traditions being rekindled or brand new ones beginning. I know our family has been like running one 800 meter to the next without a time to catch our breath, much less time to ‘know’ one another. This season reminds me of how I can make room for the new college student who has moved to town as well; but, it reminds me that if my family is on a constant chase without any reprieve, then it’s pointless.
I rarely make dessert specifically to be eaten after dinner, but sometimes having dessert planned with dinner when you’re not having guests over can be…well, special. And I think making a dessert for my family, unannounced communicates that I think they’re pretty darn special. These Sour Cream Apple Crumble Bars are perfect for that. Plus, they taste better the next day. So, you don’t have to be in the kitchen making dinner & dessert all for the same meal. They’re wonderful, and these little gems are sure to procure you praise for at least a couple of days (reason enough to make them). I would love to hear what you do to usher in Autumn!
A Year Ago: Rarely for the Planned Sour Cream Apple Crumble Bars (printable recipe)

This recipe is adapted from The Good Cookie cookbook. It reminds me of an apple pie baked from Dutch Mothers in Lynden, WA, but without having to deal with the rolling & chilling that comes from making a pie crust. The key is to let it cool to get the best overall taste.
Crust:
1 1/3 cups unbleached flour
1/3 cup unrefined evaporated cane juice
1/4 tsp salt
1/2 cup (1 stick) cold unsalted butter, cut into 1/2-inch cubes
1 large egg yolk
2 tsp cold water
3/4 tsp vanilla extract
Apple Filling:
1 pound Jonamac apples; peeled, cored, & sliced into 1/2 inch slices
2 tsp freshly squeezed lemon juice
2 Tb apple juice or cider
2 tsp cornstarch
2 Tb brandy
4 Tb unsalted butter
1/2 cup rapadura sugar
Topping:
1 cup unbleached flour
1/4 cup unrefined sugar (evaporated cane juice)
1/3 cup rapadura sugar
1 tsp ground cinnamon
1/4 tsp salt
1/2 cup (1 stick) unsalted butter, melted
Sour Cream Mixture:
1 large egg
1/2 cup sour cream
1/2 tsp ground cinnamon
1/4 tsp salt
Directions:
Make the crust: In a food processor, add the flour, sugar, & salt, combine 30 seconds. Scatter the butter pieces over the flour mixture and process until the mixture resembles coarse meal, pulse 6-8 times. In a small bowl, combine the egg yolk, cold water & vanilla. Then, with the food processor running, add the liquid and combine for 15-20 seconds. Dump the dough into a 9-inch square pan and pat it down evenly with your hands. Bake in preheated oven of 350 for 20 to 25 minutes. Remove to a wire rack to cool.
Make Apple Filling: In a medium bowl, combine the peeled/cored/sliced apples, lemon juice, cornstarch, brandy, & apple juice. Toss it around and set aside.
Melt the butter in a large skillet over medium-high heat. Once the butter is melted, add the sugar to cook. Stirring constantly until there are no more lumps. Add the apple mixture and bring to a boil. Cook for 5 minutes, or till the apples are soft on the outside but still slightly crunchy inside. Empty contents into a bowl and allow to cool completely.
Make the topping: In a small bowl, whisk together the flour, sugars, cinnamon & salt. Add the melted butter and mix with a fork, stirring until the dry ingredients are all moistened. Set aside.
Make the Sour Cream Mixture: In a small bowl, whisk the egg until well blended. Add the sour cream, cinnamon & salt to the whisked egg and whisk till combined.
Assembling the bars: Take the sour cream mixture and combine it with the apple filling. Stir well and spread evenly on the baked crust. Sprinkle the topping evenly over the sour cream apple mixture. Bake for 35 to 40 minutes, until golden brown around the edges and set. Cool the bars completely before serving. You can dive right in if you’d like; however, they taste so much better when they’re completely cooled.
Chocolate Chip Cookie Olympics

I remember sitting on my parents bed watching the opening ceremony of the 1992 Olympics in Barcelona, Spain. I was eager in anticipation to watch the Women’s (really girls) gymnastic team. I would study their moves, watch with my jaw dropping at Dominque Dawes floor performance and wonder why my mom didn’t enlist me on my path toward gold medaldom (copyright Kamille) at age 2. However, once it hit the Atlanta Olympics, where the US Women clinched the gold title with Kerri Strug’s renowned performance on the vault, my interest in the Olympics had hit a standstill. Not only have they hit a standstill, but a divorce of the relationship. As I sat around a table of friends discussing how they couldn’t get enough of the Winter Olympics in Vancouver and how they’re a bit sleep deprived as a result, I hated to respond, because I was afraid of the obvious scorn. I piped in a bit sheepishly, “Yeah, well, I haven’t watched one ounce of Olympic coverage this year.” Looks were given. Them trying to be courteous without telling me of my ignorance.
So there you have it. I’m not an Olympic watcher. It honestly doesn’t interest me that much anymore. I understand why people get all excited about it (the various cultures & people represented, the nostalgia, etc, etc); but, really, it’s something I’m not crazy about. Instead, I have spent the past two days preparing for what I call the Chocolate Chip Cookie Olympics. Now this is something I get excited about. A chocolate chip cookie can bring people together or tear them apart. You understand. You walk into a coffee shop and they have those big chocolate chip cookies in the big glass container and you pause. You really want to eat one, but you wonder if they meet the criteria. You could possibly end up hashing out $1.50 – 2.00 on a waste of your daily caloric intake. I would wager to say that there is nothing quite as disappointing as biting into what looks like the promise land flowing of chocolate chips & butter to find a C.C.C. disguised as a dry sand-like substance floating around your mouth. We’ve all been there. So I set out to make three different chocolate chip cookie recipes, where I would present them to my tasters and they would judge & award gold, silver, & bronze.
 Superlative Chocolate Chip Cookies (Cooks Illustrated)
I first made these Superlative Chocolate Chip Cookies from Cooks Illustrated in late summer (click on the above picture and it will take you there). These cookies probably have one of the most superb flavor profiles you’ll find. I chose this recipe, because it is my favorite chocolate chip recipe. The recipe calls for chocolate chips & toasted pecans. There are chocolate chip recipes masquerading as “chocolate chip cookies,” but they’re not true to the definition. The ones that include oats, dried fruit, nut butters, coconut, etc. They’re good for sure, but for the sake of all things being equal. I was on the search of a true chocolate chip cookie, no strings attached. So for this round, I took out the toasted pecans to make it equal among the other two candidates.
The other two contestants were the classic N.Y. Times chocolate chip cookie & a recipe claimed as the best chocolate chip cookie from ‘Not Without Salt‘ blog. A word why these two were chosen. My friend Paige loves to bake equally as much and I would say enjoys food more than I do (that’s a compliment by the way). She has mentioned that these are her family’s chocolate chip cookie of choice. After I posted on the Superlative C.C.C., she commented that her & her husband Stephen still found their aged cookie to be better. I still never made them. Then, a couple days ago, a friend Julie emailed me about the best cookies she ever tasted with sea salt on top. Guess which cookie she was talking about? Yup! N.Y. Times C.C.C. So they were enlisted immediately. And the last cookie was enlisted because Ashley Rodriguez of Not Without Salt was the former Pastry Chef of Ciao Thyme in Bellingham. I trusted the head chef Matio Gillis’ opinion of Ashley, so when she said her’s were the best, I thought, “heck, I need to try them.” And so goes the C.C.C. Olympics.
I made each of the cookies warm to order, so all of the tasters ate them warm. I however, didn’t make them equal in using the same type of chocolate for each, which caused a bit of discrepancy in the final tasting (but I did take that into account for the final tallying). I will go through each cookie stating the Pros & Cons.
 Cooks Illustrated Cookie
Pros: Tasters said these had the best flavor of the three. They noted, “buttery, salty, caramel & toffee, nutty…tastes like a blondie in cookie form…chewy, with crisp edges.” These cookies don’t need to sit in the fridge for 24 to 36 hours to get those flavors, like the N.Y. Times cookie. They don’t require a mixer, just a whisk.
Cons: Texture didn’t win as big on these. Although they were chewy, they lacked the combination of soft, chewy that one taster found she liked in the “Subway Chocolate Chip Cookie.” Upon sitting at room temperature, these cookies tend to dry out a bit faster. One taster said that he didn’t care for the chocolate in these cookies, compared to the N.Y.Times one. However, I did use different chocolate chips in both, so had I used the same kind, the outcome could have been different. Doesn’t make as many cookies as the other recipes.
Technique: The caramel, toffee, nutty taste comes from melting the butter and toasting it; rather, than the typical creaming method. By melting the butter, you’re taking out some of the liquid found in the solidified butter and lends to a chewier cookie. Also, by using one egg & one egg yolk, you create more chew and take away the protein found in the extra white, which cuts back the dryness factor. I chilled this dough for 12 hours in the fridge and measured all the ingredients; as well as, measuring each cookie to 3 1/2 ounces to bake.
 NY Times Cookie
Pros: The tasters were unanimous about loving the texture on this cookie. As one taster mentioned sheepishly, “It tastes like, don’t judge me, but like the Subway cookies, a bit of chew, softness, chocolate chunk, and melds together well.” Another taster said, “as a chocolate chip cookie purist, this one wins for me. This is what I think of when you say Chocolate Chip Cookie.” For me, I did two tastings. One at 36 hours of aging the dough and another at 41 hours, and I would say that this cookie tasted better the second time. The first tasting I didn’t taste strong notes of toffee, caramel, or butterscotch like the article said it would have at 36 hours. However, I did taste it at the 41 hour mark. They still have softness after sitting on the counter (wrapped up) 24 hours later.
Cons: They take 36 hours in the fridge before they’re ready. And if you want more depth of flavor, leave them in there up to 72 hours (reminded me of how long a baby can stay in the womb once the mama’s water breaks–weird, huh?). The flavor wasn’t as stand out as the Cooks Illustrated.
Technique: What makes these cookies stand out is letting them sit in the fridge for up to 36 hours before baking them. And you sprinkle sea salt on top to let the flavors pop. By letting the dough age, you’re allowing the proteins in the flour meld with the butter, sugar & salt to create a broader flavor profile. You also use two different flours (cake flour & bread flour), which create a wonderful marriage in the chemistry arena of the baking process. Cake flour with low proteins doesn’t suck up liquid like bread flour; rather, cake flour’s low protein creates a softer, paler end product along with the protein creating steam with the liquids. Bread flour with it’s higher protein browns faster and sucks up the liquid. So if you only used cake flour, you would have a cakey cookie, lacking any chewiness or a bit of a crust. However, if you only used bread flour, you would end up with a very brown, crisp cookie. Hence the perfect marriage. I also used 60% & 70% cacao, along with some milk chocolate chunks in this dough.
 Not Without Salt Cookie
Pros: This was the least loved. Tasters said it was fine, and a nice fall back option. The dough was a bit above average (C+). The sprinkling of sea salt added that pop flavor. I could note a bit uniqueness in the crust, which might be attributed to the use of Turbinado sugar. I had a bit of caramel tones.
Cons: Too much chocolate (the recipe called for quite a bit), lacked anything special about it. It was okay, but not the best.
Technique: I went ahead and let this one sit in the fridge for 36 hours too, but it never aged as well as the N.Y. Times cookie. If I were to make these again, I wouldn’t use as much chocolate as the recipe called for, because it ended up feeling like you were eating chocolate with some cookie, not the other way around. Sprinkling Fleur de Sal on top before baking lends something extraordinary to even the most ordinary chocolate chip doughs.
Results: The tasters were not unanimous in their decisions. One said her favorite was the Cooks Illustrated. Three other tasters said the N.Y. Times one was their favorite. And as one taster said, “Although the flavor of the C.I. cookie is superior to the N.Y. Times one, the N.Y. Times has great texture and slightly inferior flavor, but makes it a better cookie since it meets both standards–regardless if the flavor isn’t as superior.”
So if you have time on your hand (41 hours to 72 hours), make the N.Y. Times cookies. However, if you want warm cookies right now, make the Cooks Illustrated. The comparison between the two reminds me of Michael Phelp’s Miracle finish. So you be the judge and make both–let me know what you think.
Overall Scores:
Gold to N.Y. Times
Silver to Cooks Illustrated
Bronze to Not Without Salt
Update (2/28/2010): I did not use the feves talked about in the N.Y. Times recipe. Instead, I bought a pound of chocolate from Trader Joe’s (70%) and cut it into smaller chunks with a serrated knife. I did the same with some milk chocolate I have in bulk. You could use packaged chocolate chunks as well. I feel like the chocolate chip texture doesn’t hit the spot as well as chunk form.
